TL;DR
In small spaces like closets, distance and placement trump fancy foam. Moving your rig away, adding textured surfaces, and sealing entry points cut noise and echo better than foam alone. The key is balancing cooling and soundproofing with strategic layout and materials.
Ever tried recording vocals or working in a tiny closet and felt like you’re inside a cardboard box? Small spaces amplify reflections and low-frequency booms, making everything sound boxy and muffled. But here’s the twist: the best way to improve sound isn’t always buying more foam.
More often than not, moving your rig away from your ears and treating the surfaces that bounce sound around gives you a cleaner, clearer tone. This guide breaks down why placement matters, how to dampen reflections, and the best DIY tricks to turn your cramped closet into a surprisingly effective studio.
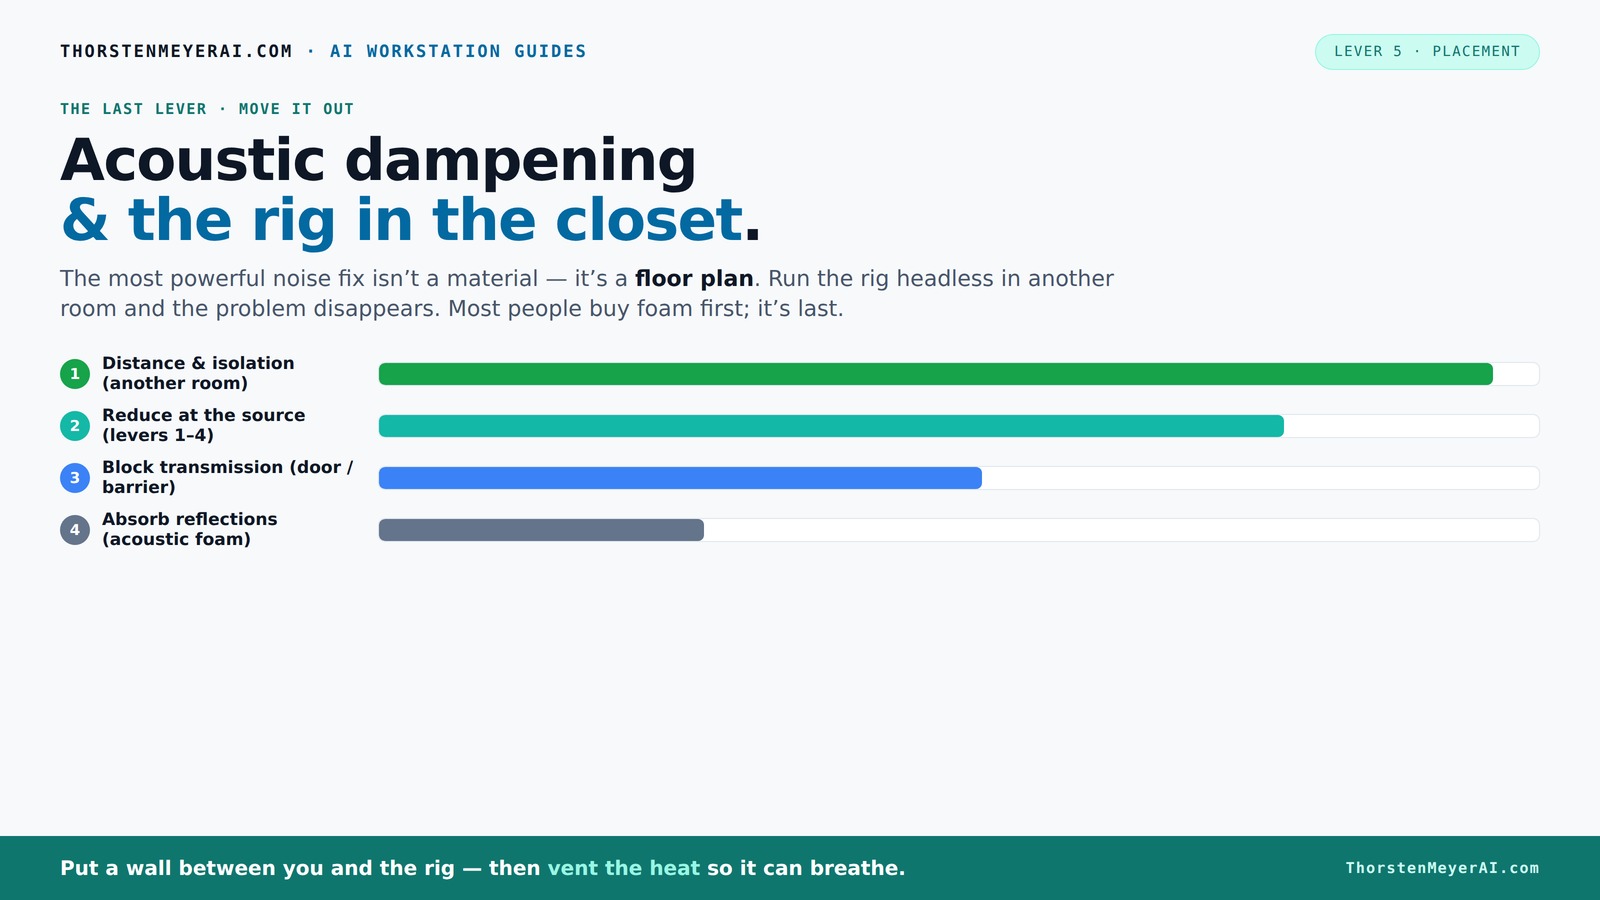
Acoustic dampening
& the rig in the closet.
The most powerful noise fix isn’t a material — it’s a floor plan. A rig you can’t hear because it’s in another room beats any amount of foam. Tap the approaches in Part 1 to see what actually works.
(another room)
(levers 1–4)
(door / barrier)
(acoustic foam)
Contain the noise, not the heat
Key Takeaways
- Distance and placement are more effective than foam in reducing noise and echo.
- Treat reflection points — behind the mic, ceiling, side walls — with textured, absorbent materials.
- Use corner bass traps or DIY solutions to control low-frequency buildup in small rooms.
- Seal gaps around doors and outlets to prevent sound leaks, but don’t overly seal to avoid heat buildup.
- Layer materials: combine foam, blankets, rugs, and soft furniture for best acoustic results.
soundproofing foam panels for small rooms
As an affiliate, we earn on qualifying purchases.
As an affiliate, we earn on qualifying purchases.
Why Your Closet Isn’t Just Less Echoey — It’s a Sound Trap
Many think sealing a closet with foam turns it into a soundproof booth. But that’s only half the story. A closet is a perfect echo chamber if you don’t control what’s bouncing around inside.
Think of your closet like a small cave—every surface reflects sound, especially low frequencies. Those reflections cause muddiness and make recordings sound boomy. The real goal? Break up those reflections and absorb the echo.
For example, a YouTuber transformed her tiny closet into a vocal booth with just a few blankets and some foam. The difference? She didn’t just seal the door — she added irregular, soft surfaces that soaked up echo and made her vocals crisp and clear.
acoustic treatment for closet studio
As an affiliate, we earn on qualifying purchases.
As an affiliate, we earn on qualifying purchases.
Where to Place Your Microphone and Acoustic Treatments for Best Results
Place the mic where your sound is clearest and least affected by reflections. Typically, that’s about a foot away from the wall behind it, facing into the room’s open space. Experiment by moving the mic closer to your mouth and away from reflective surfaces.
Now, treat the surfaces that bounce sound back into the mic. Focus on the wall behind the mic, the ceiling, and the side walls. Don’t just cover corners — add textured materials across the whole space.
For example, mounting foam panels 2 inches thick at reflection points reduces echo by 40-50%. Adding a soft rug on the floor or hanging blankets over the closet door can cut reverb even more. The goal? Break up flat, parallel surfaces that cause standing waves and low-frequency buildup.
Why does this matter? Proper placement minimizes the direct reflections that reach your microphone, preventing comb-filtering and phase issues that can muddy your recordings. Covering all key reflection points creates a more consistent sound environment, ensuring your recordings are clearer and more natural. The tradeoff? Too much treatment can deaden your sound or make the space feel overly damp, so balance is key.
sound isolation pads for computer rigs
As an affiliate, we earn on qualifying purchases.
As an affiliate, we earn on qualifying purchases.
How to Tackle Low Frequencies & Reduce That Boxy Sound
Low frequencies are the sneakiest part of closet acoustics. They cause that boomy, muffled sound that makes your voice or music sound hollow. The trick? Bass traps and corner treatment.
In a tiny room, low-end buildup happens because sound waves bounce between parallel walls. Installing bass traps in the corners can reduce this by up to 70%. If you don’t have commercial traps, DIY options like dense pillows or thick blankets stuffed into corners work surprisingly well.
For example, placing a thick blanket folded into a wedge in each corner cut the low-end boom in half—making vocals sound tighter and more natural. Don’t forget: the goal is to scatter and absorb those waves, not just block higher frequencies.
Why is this important? Low-frequency buildup can mask clarity, making recordings sound muffled or boomy. Proper treatment ensures your sound remains tight and well-defined. The tradeoff? Over-treating low frequencies can make the sound overly dull; focus on the corners and avoid excessive damping of other frequencies.
DIY soundproofing materials for home studio
As an affiliate, we earn on qualifying purchases.
As an affiliate, we earn on qualifying purchases.
Budget-Friendly Materials & DIY Hacks for a Quieter Closet
You don’t need a studio full of gear to tame a noisy closet. Soft, irregular surfaces are your best friends. Think thick blankets, heavy curtains, and DIY panels made from foam, egg crate mats, or even old quilts.
For example, hanging a layered blanket system across the closet door and walls can cut noise by 50% or more. Adding a few acoustic panels behind the mic and on the ceiling further reduces echoes.
Pro tip: Combine materials. Use a foam panel on the wall, a rug on the floor, and blankets hanging from the ceiling for a multi-layered sound trap. It’s cheap, effective, and customizable.
Why does this matter? Different materials absorb or scatter sound in unique ways. Layering them creates a more comprehensive acoustic environment, reducing echoes and preventing sound leakage. The tradeoff? Too many layers can make the space feel cramped or overly damp, so choose your materials thoughtfully.
Common Mistakes That Kill Your Closet’s Sound Quality
Sealing all gaps sounds logical, but overdoing it can trap heat and cause overheating. Also, relying only on foam in a tiny room often makes things worse — it can deaden sound but doesn’t absorb enough low frequencies, leading to a boxy tone.
Another mistake? Placing the mic directly in front of a reflective wall or window. Instead, position it where reflections are minimized, and treat the surfaces that the sound bounces off.
For example, a streamer kept her mic facing the door, which reflected her voice. Moving it 45 degrees away from the door and adding a soft panel reduced echo and made her voice much clearer.
Why does this happen? Over-sealing can trap heat, which may damage equipment or make the space uncomfortable. Also, improper mic placement increases unwanted reflections, muddying your recordings. Recognizing these pitfalls helps you make smarter choices, balancing soundproofing with ventilation and placement to get the best results without compromising comfort or sound quality.
Frequently Asked Questions
Is a closet booth just less echoey or truly soundproof?
A closet booth primarily reduces echo and reflections, making recordings clearer. It’s not fully soundproof, but sealing gaps and adding insulation can significantly cut leakages. For true soundproofing, you need specialized barriers and construction.
Where should I place acoustic panels or foam in my closet?
Place panels at reflection points: behind the mic, on the ceiling, and on side walls facing the mic. Avoid only corner treatment — spreading panels across all key reflection surfaces provides a more balanced sound.
Do I need bass traps in a tiny closet?
Yes. Bass traps in the corners help control low-frequency buildup, which causes boominess. DIY options like dense pillows or thick blankets in corners can work well in small spaces without costly traps.
How thick should panels or blankets be?
2-inch thick foam or blankets are usually enough for small closets. Larger rooms or those with serious low-frequency issues benefit from 4-inch panels or multiple layers.
How much of the closet should I cover?
Cover key reflection points, roughly 50-75% of the wall area around the mic, ceiling, and side walls. Full coverage isn’t necessary; focus on the surfaces that bounce sound back toward the mic.
Conclusion
In tiny spaces, your best bet isn’t a wall of foam — it’s smart placement and textured surfaces. Moving your rig into a closet or cabinet with proper ventilation can turn chaos into clarity. Think of your small room as a canvas: a few well-placed treatments make all the difference.
Remember, a quiet, clear workspace doesn’t come from just sealing cracks or piling foam — it’s about where your sound goes and how it bounces. With a little effort, your closet can become a surprisingly effective studio that’s quiet on the outside and professional on the inside.