To try natural dyeing with kitchen scraps, gather items like onion skins, cabbage leaves, or coffee grounds, making sure they’re clean. Simmer them in water for at least an hour, then strain out the scraps to create your dye bath. Pre-treat your fabric with a mordant like alum for better color. Submerge the fabric, soak for hours or overnight for richer shades, then rinse, dry, and enjoy your eco-friendly creation—learn more to perfect your technique.
Key Takeaways
- Collect and prepare kitchen scraps like onion skins, cabbage leaves, and beet tops, ensuring they are clean before use.
- Simmer scraps in water for at least an hour, then strain to create a vibrant dye bath.
- Choose natural fabrics such as cotton, linen, or silk, and pre-treat with mordants to enhance color absorption.
- Submerge fabric in the dye bath, stir gently, and soak for desired intensity, possibly overnight for richer hues.
- Rinse in cool water, hang to dry in shade, and store away from sunlight to preserve the natural dye colors.
If you’re looking for an eco-friendly way to add vibrant color to your textiles, DIY natural dyeing is a rewarding and sustainable option. Using plant-based dyes, you can transform everyday kitchen scraps into stunning hues without relying on synthetic chemicals. This approach aligns with eco-friendly techniques, helping you reduce waste and minimize your environmental impact. Plus, it’s easy to get started with simple ingredients already in your pantry or garden.
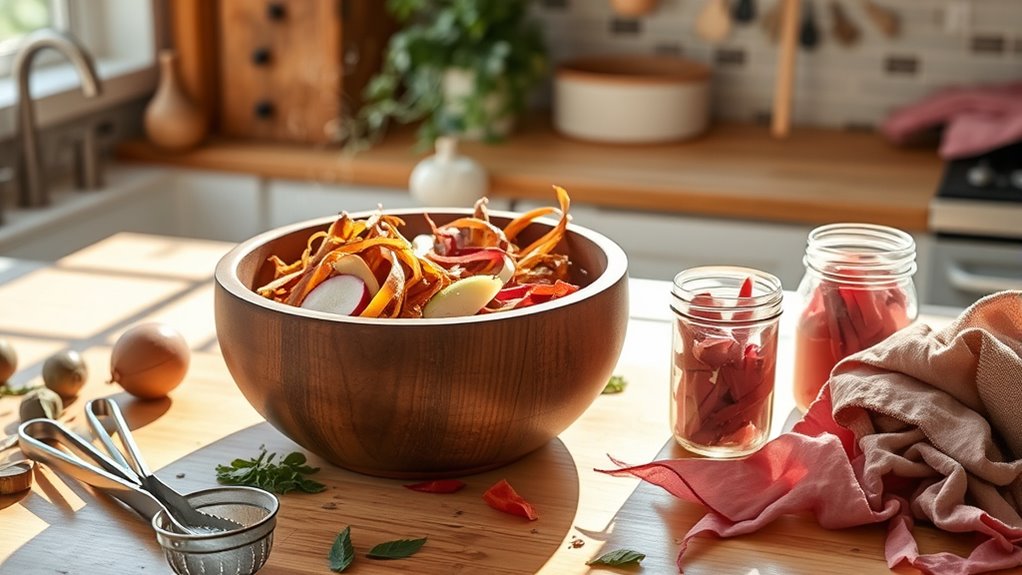
Begin by gathering your kitchen scraps—think onion skins, avocado pits, beet tops, coffee grounds, turmeric, and cabbage leaves. Each of these contains natural pigments that can produce a range of colors. For example, onion skins yield warm yellows and oranges, while cabbage can give you shades of blue or purple. Before dyeing, wash your fabric thoroughly to remove any dirt or oils that might interfere with color absorption. Natural fibers like cotton, linen, or silk work best because they absorb plant-based dyes more effectively.
Next, prepare your dye bath. Fill a large pot with water and add your chosen scraps. For more concentrated colors, you can add more scraps or simmer the mixture longer. Bring the water to a boil, then reduce to a simmer and let it cook for at least an hour, sometimes longer for deeper hues. During this process, the plant pigments are released into the water. Strain out the scraps once the dye has fully infused, leaving you with a vibrant, colored liquid. Additionally, understanding the 16PF personality traits can help you tailor your creative projects to reflect your personal style and preferences.
Now, it’s time to dye your fabric. Submerge your textile into the dye bath and stir gently to ensure even coloring. Keep the fabric in the dye for as long as desired—longer soaking results in richer colors. For more intense shades, you can leave it overnight. If you want to experiment with eco-friendly techniques, try mordanting your fabric beforehand with natural mordants such as alum or iron, which can help set the dye and produce different tones.
After dyeing, rinse your fabric in cool water until the water runs clear. Hang it to dry in a shaded area to prevent fading from direct sunlight. Remember, natural dyes can fade over time, especially if exposed to sunlight, but proper care and washing in cold water will help your colors stay vibrant longer.

Honey Oak Natural Tie Dye Kit | 3 Color Extract Set – Olive Green, Sunflower Yellow, Turkey Red | Plant-Based Fabric Dyes for Shibori & DIY Fabric Art | Easy to Use Craft Kit
Natural & Non-Toxic Dye – Made from 100% natural sources, Honey Oak’s dye is safe, chemical-free, and perfect…
As an affiliate, we earn on qualifying purchases.
As an affiliate, we earn on qualifying purchases.
Frequently Asked Questions
How Long Do Natural Dyes Last on Fabrics?
Natural dyes typically last several years on fabrics if you consider fiber absorption and dye stability. To guarantee longevity, you need proper mordanting, which enhances fiber absorption, and careful fixing methods for dye stability. Keep your dyed fabrics out of direct sunlight and wash them gently to prevent fading. With good care, your natural dyes can remain vibrant and beautiful, lasting well beyond a few years.
Can I Use Leftover Kitchen Scraps for Multiple Dye Baths?
You can definitely reuse scraps for multiple dye baths, but it’s a case of don’t put all your eggs in one basket. Reusing scraps helps with dye batch rotation, extending your resources and reducing waste. Keep in mind, each subsequent dye bath might yield lighter or different shades, so plan accordingly. Always strain and store leftovers properly to maximize their dyeing potential and get the best results from your natural dyes.
What Are the Safety Precautions for Natural Dyeing?
When natural dyeing, you should prioritize safety by always wearing protective gear like gloves and masks to avoid skin or respiratory irritation. Guarantee good ventilation safety in your workspace by working outdoors or opening windows to prevent inhaling fumes. Carefully handle any mordants or chemicals, and wash your hands afterward. Keeping your workspace clean and following safety guidelines helps you enjoy dyeing while minimizing health risks.
How Do I Fix the Dye to Prevent Fading?
To prevent fading, you need to fix the dye properly by using fixing mordants like alum or iron, which help the color adhere better to the fabric. Always rinse your dyed item in cold water after fixing to avoid washing out the color. Avoid exposing your fabric to prolonged sunlight, as UV rays can cause fading. Proper fixing and careful handling ensure your vibrant color lasts longer.
Are Natural Dyes Colorfast on All Fabric Types?
Did you know that natural dyes can vary in colorfastness depending on the fabric? You might find that natural dyes are more vibrant on some fabrics than others. Generally, dye color variability affects fabric compatibility; natural dyes tend to be more colorfast on cellulose fibers like cotton and linen, but less so on protein fibers like silk or wool. Always test a small patch first to see how your fabric responds.

Organic Cotton Plus Alum Mordant – Aluminum Sulfate – 1 Pound
100% Iron Free Aluminum Sulfate
As an affiliate, we earn on qualifying purchases.
As an affiliate, we earn on qualifying purchases.
Conclusion
Now that you’ve learned how to turn kitchen scraps into beautiful dyes, don’t you feel inspired to experiment further? With just a few simple steps, you can create vibrant, eco-friendly colors for your fabrics. So, why not start today and see what stunning shades you can uncover? Embrace your creativity and enjoy the satisfying process of sustainable DIY dyeing—your next colorful project is just a scrap away!

60 Pcs 4" x 4"(10cm x 10cm) Assorted Craft Fabric Bundle Squares Patchwork Fabric Sets for DIY Sewing Scrapbooking Quilting Dot Pattern
Package: 60 pcs a set.(Random style: design and color is not repeated ).
As an affiliate, we earn on qualifying purchases.
As an affiliate, we earn on qualifying purchases.

A Weaver's Garden: Growing Plants for Natural Dyes and Fibers (Dover Crafts: Weaving & Dyeing)
As an affiliate, we earn on qualifying purchases.
As an affiliate, we earn on qualifying purchases.